Fun Ways to Showcase your Testimonials on your Squarespace Site
In today’s digital world, social proof is everything. We trust people more than we trust brands, and if you’re not showing off your glowing reviews, you’re missing a massive opportunity to turn casual browsers into loyal clients!
Good reviews built trust and credibility, establish you as an expert, and can do wonders for convincing clients to actually work with you, but adding all of those glowing reviews to your site might feel a bit overwhelming.
In this post, we're showing you a few easy-to-create and fun-to-use options to showcase all of your best reviews right on your Squarespace site so that site visitors actually want to read them.
Check out the step by step tutorials below!
Why you Need Reviews on your Website
💬 Reviews Build Instant Credibility
Reading real testimonials from happy clients, is one of the best ways for your potential customers to instantly feel more confident about what you're offering. They build trust, showing your potential clients that you've done this before (and you've done it well!), they help humanize your brand, and they make potential clients look forward to the results. It’s like having past clients vouch for you 24/7!
💸 Reviews Boost Conversions (it’s science)
We love throwing in a bit of science, and a recent study by Biswas, Sengupta, & Ganguly (2021) has shown that products with at least five reviews are 270% more likely to be purchased that those without any reviews.
If that number doesn't sell you on why you need to add reviews to your website, then hurry up and add reviews to your site already!!
🔍 Reviews Help Your SEO (without extra work)
Google loves fresh, relevant content—and reviews count! When your site has constantly updated reviews, search engines will notice. Keywords will naturally pop up in your clients' feedback, which can give your website a little SEO boost without you hardly lifting a finger!
How to Add Reviews to Your Squarespace Site
Here are 5 creative, on-brand ways to add testimonials to your Squarespace site—no tech stress required!
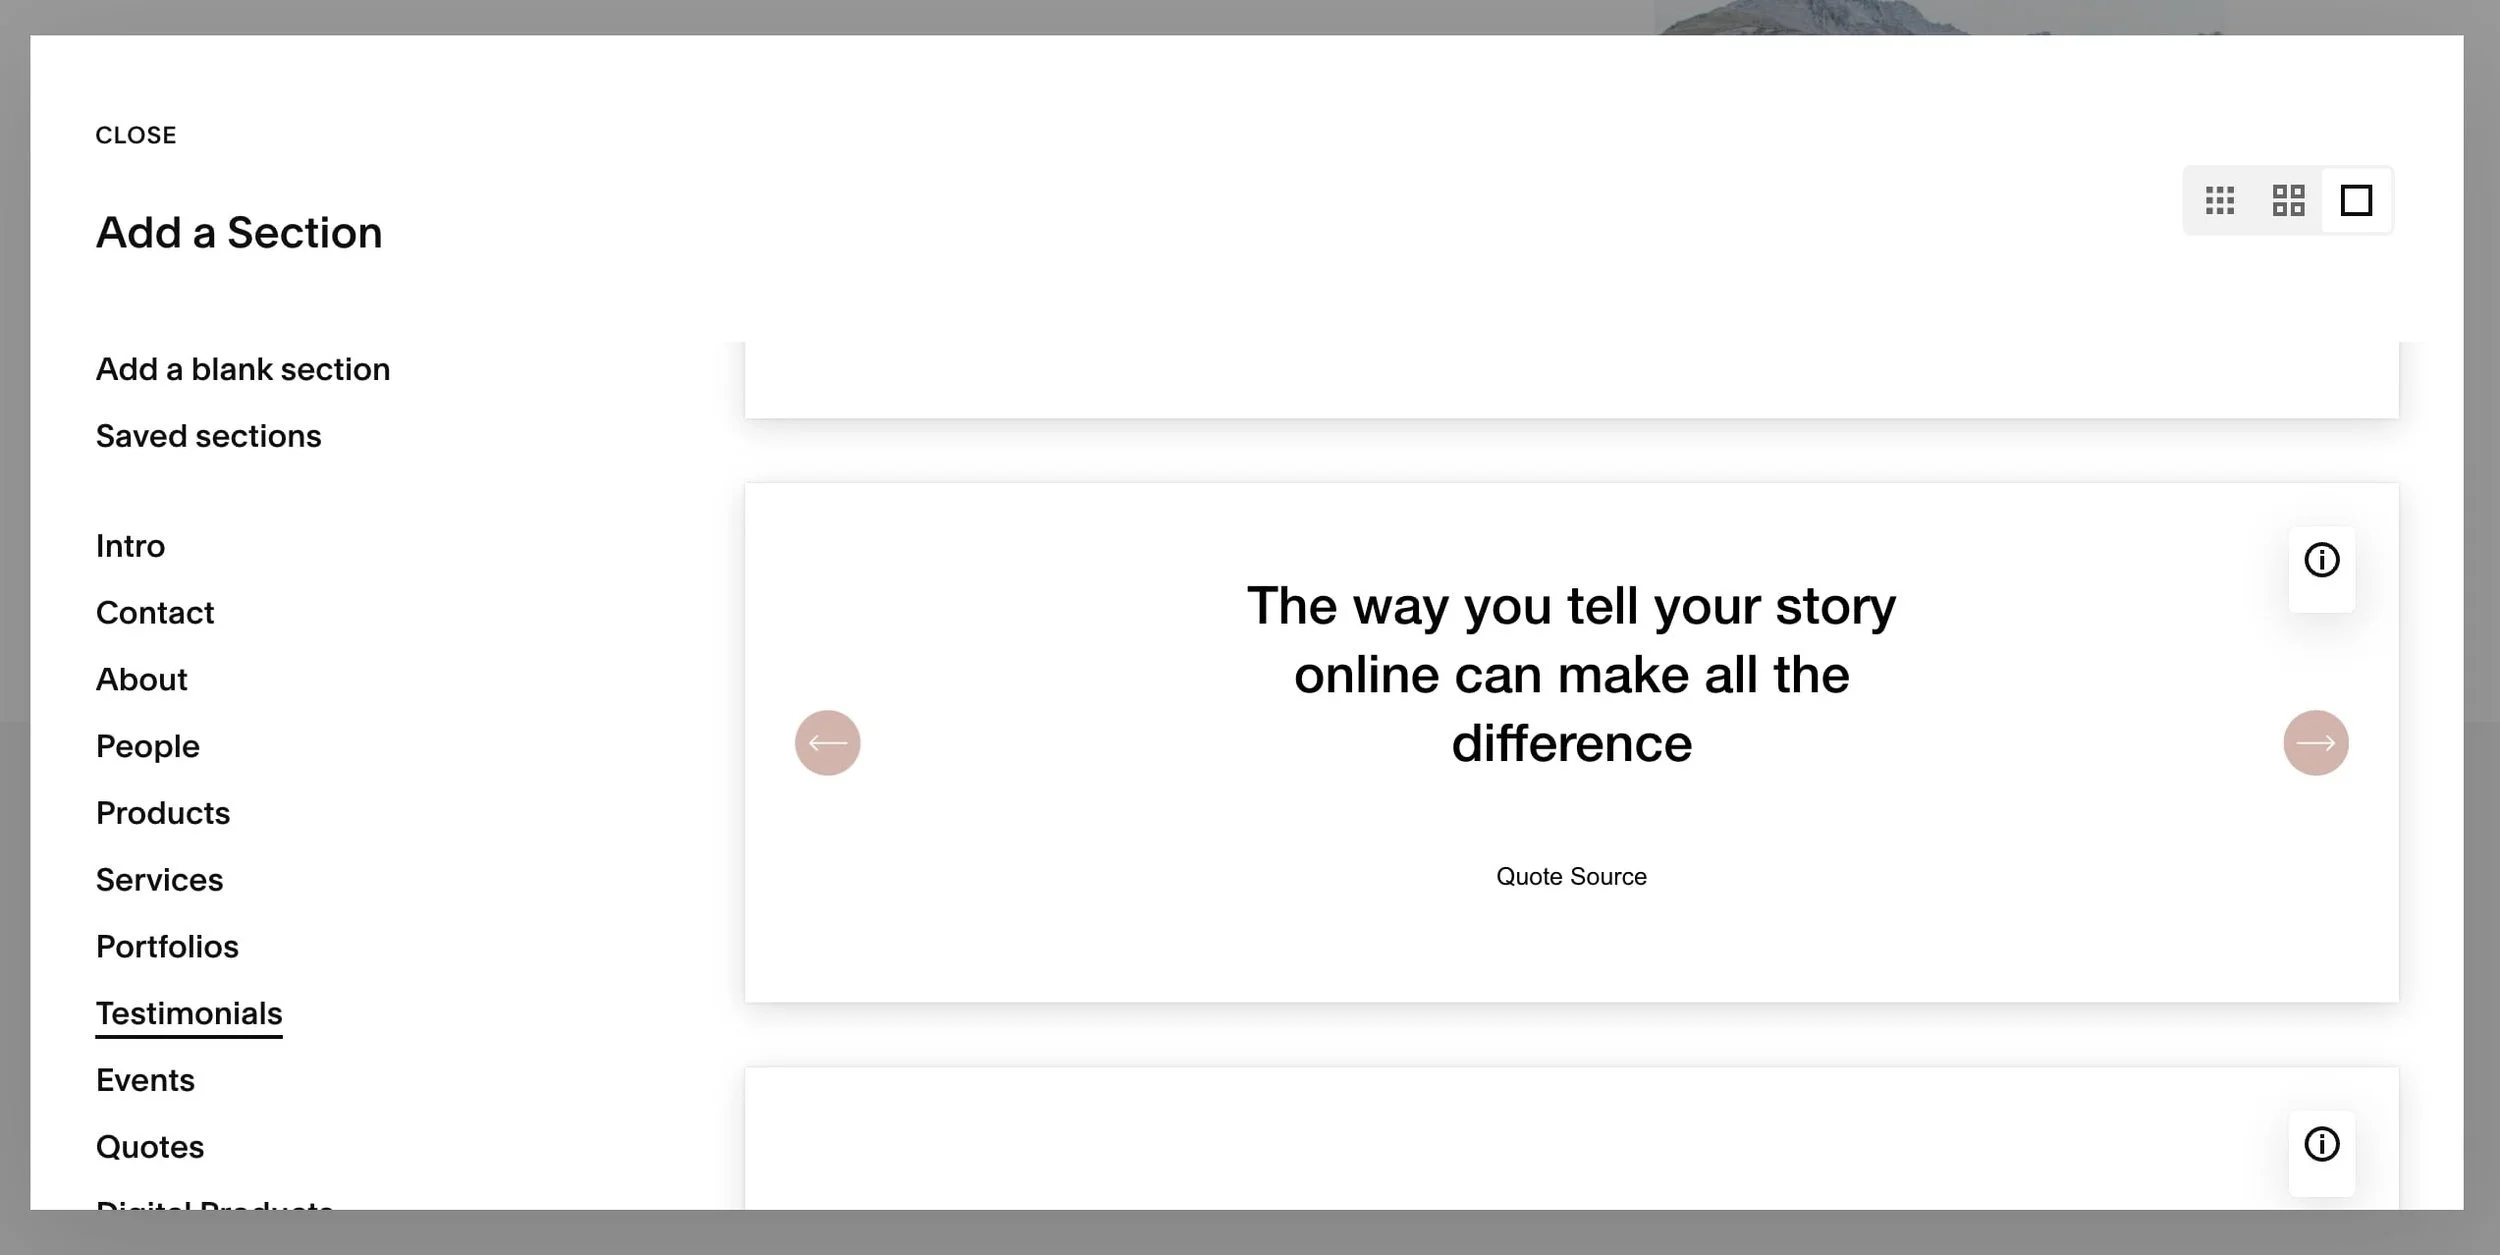
1. Built-in Testimonials Sections
Starting off with the easiest option, Squarespace has some pretty handy pre-built sections that you can add just about anywhere around your site in literally two clicks, and they've truly thought of it all, because they've included some testimonial sections, ready to go!
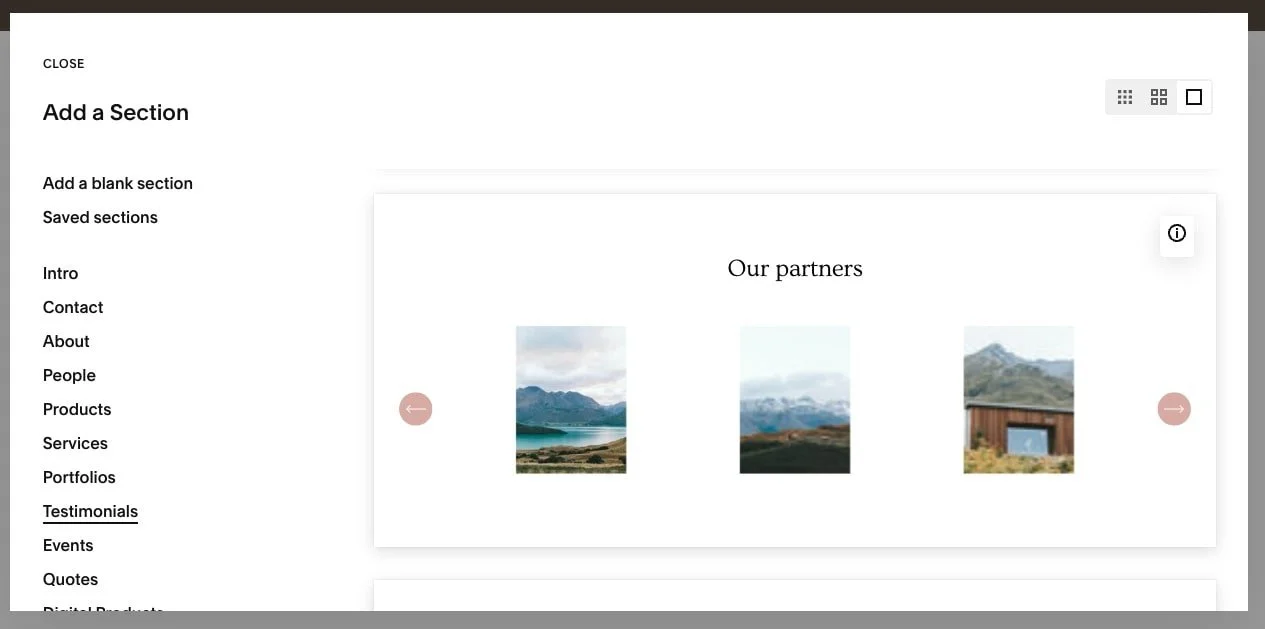
How to access built-in sections in Squarespace:
Click Edit in the top right corner
Hover between two sections and click the blue Add Section button
In the pop up, scroll down to the Testimonials tab in the left hand side
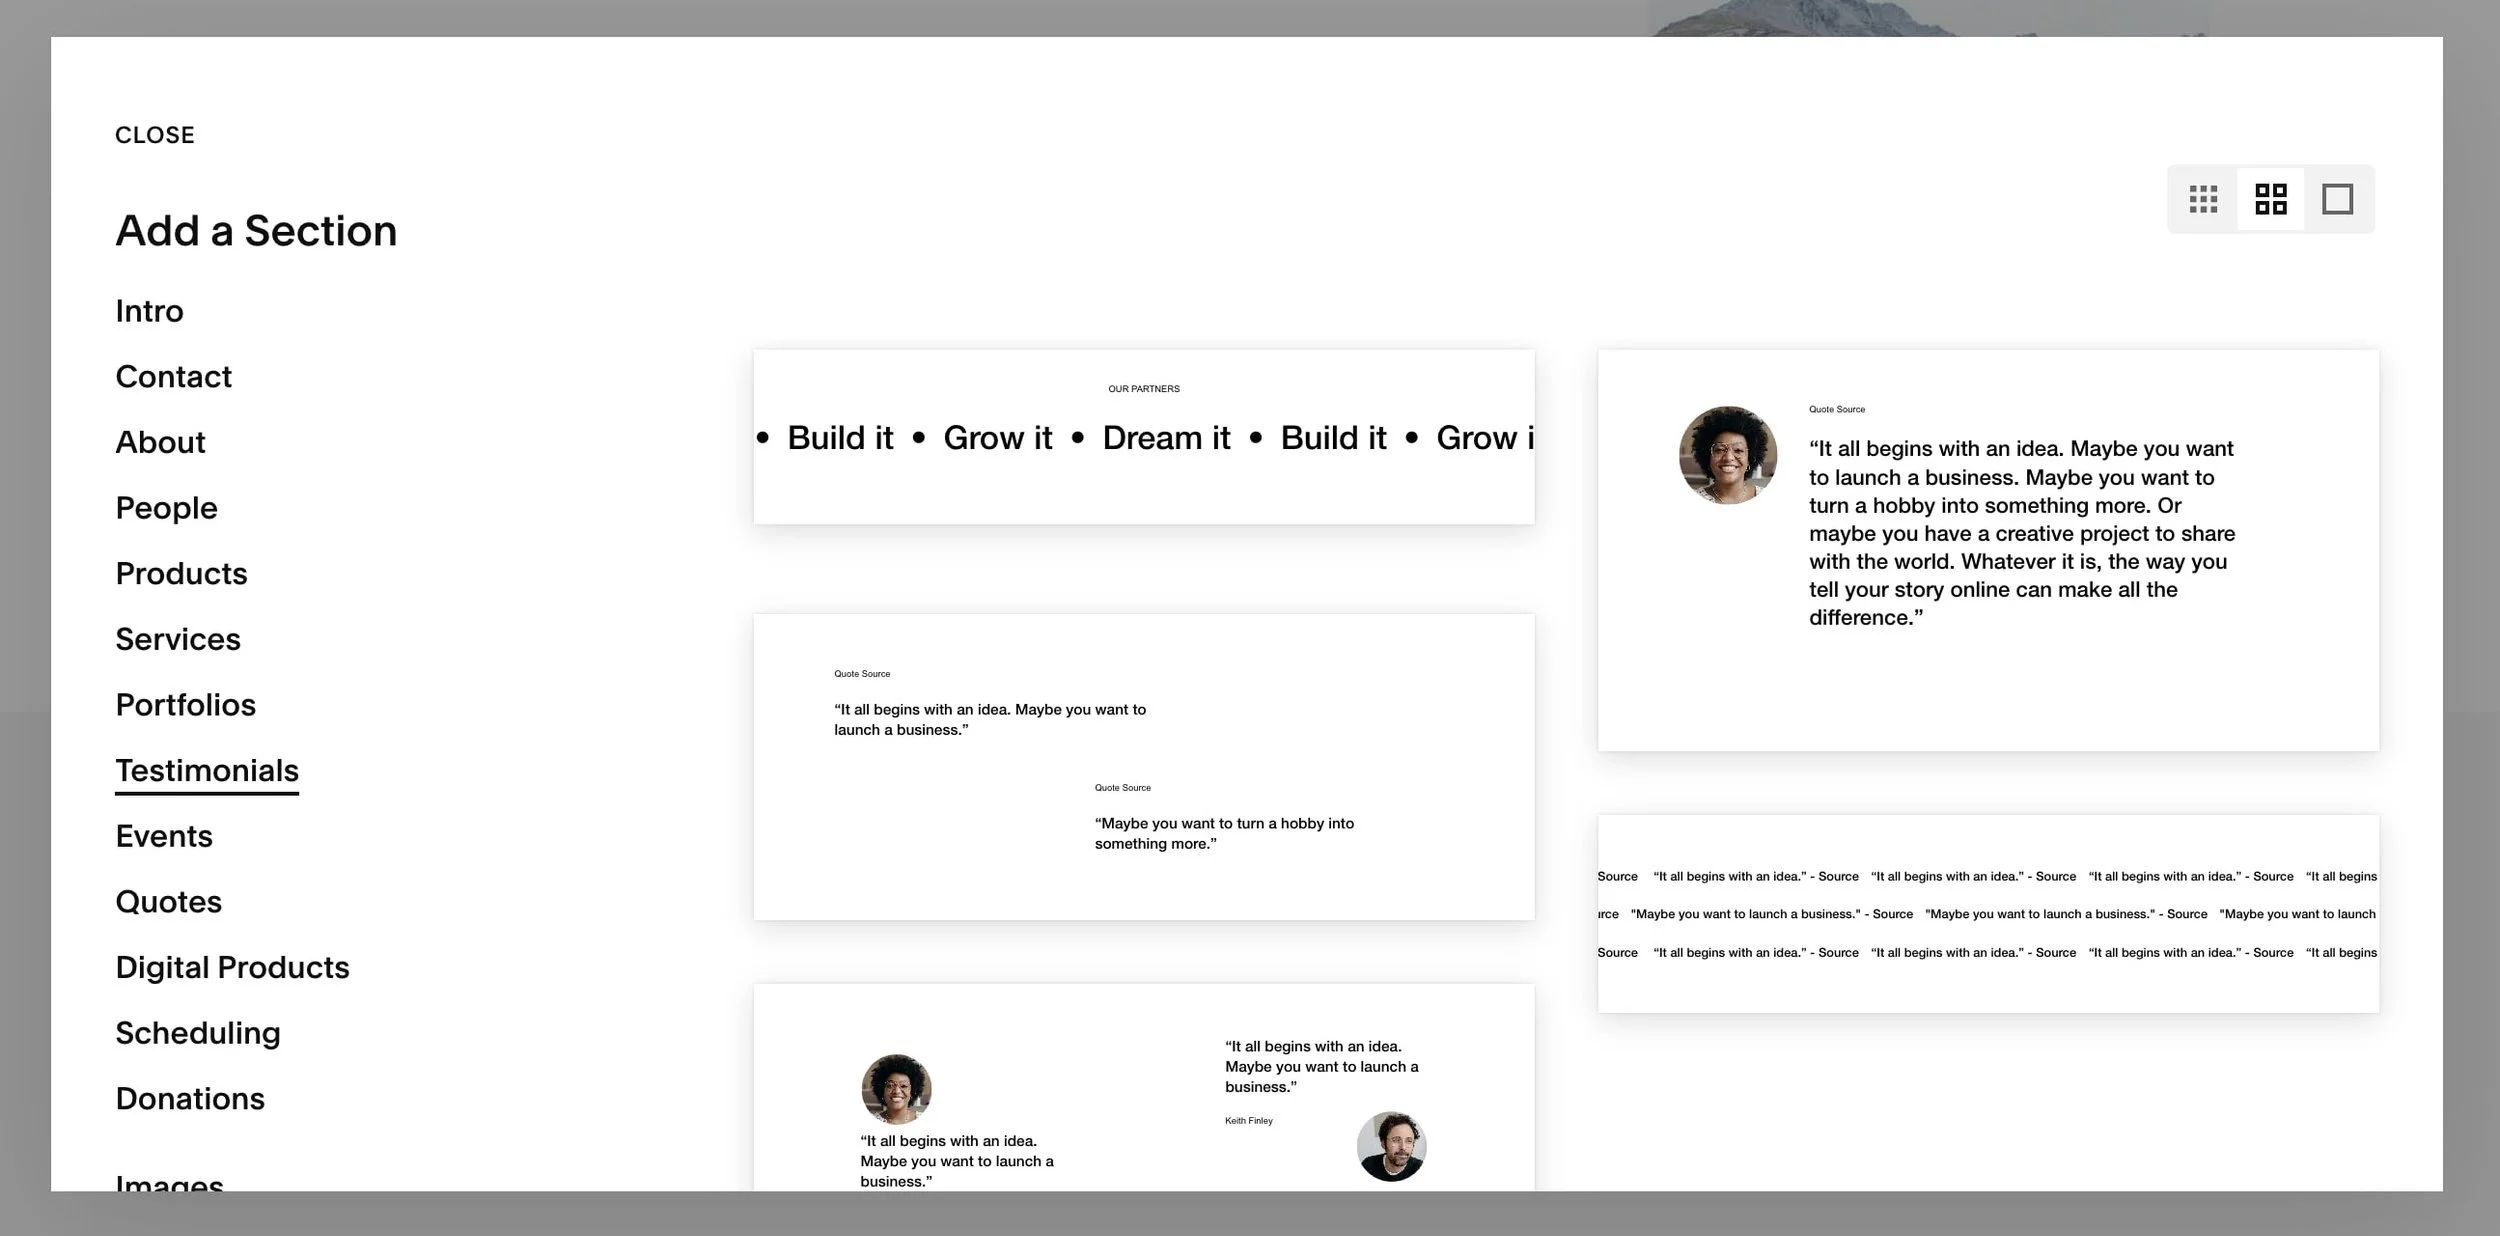
Here, you'll find a few handy designs to get you started! Click on the one you like the look of most and it will be added straight into your website, ready to be customized!
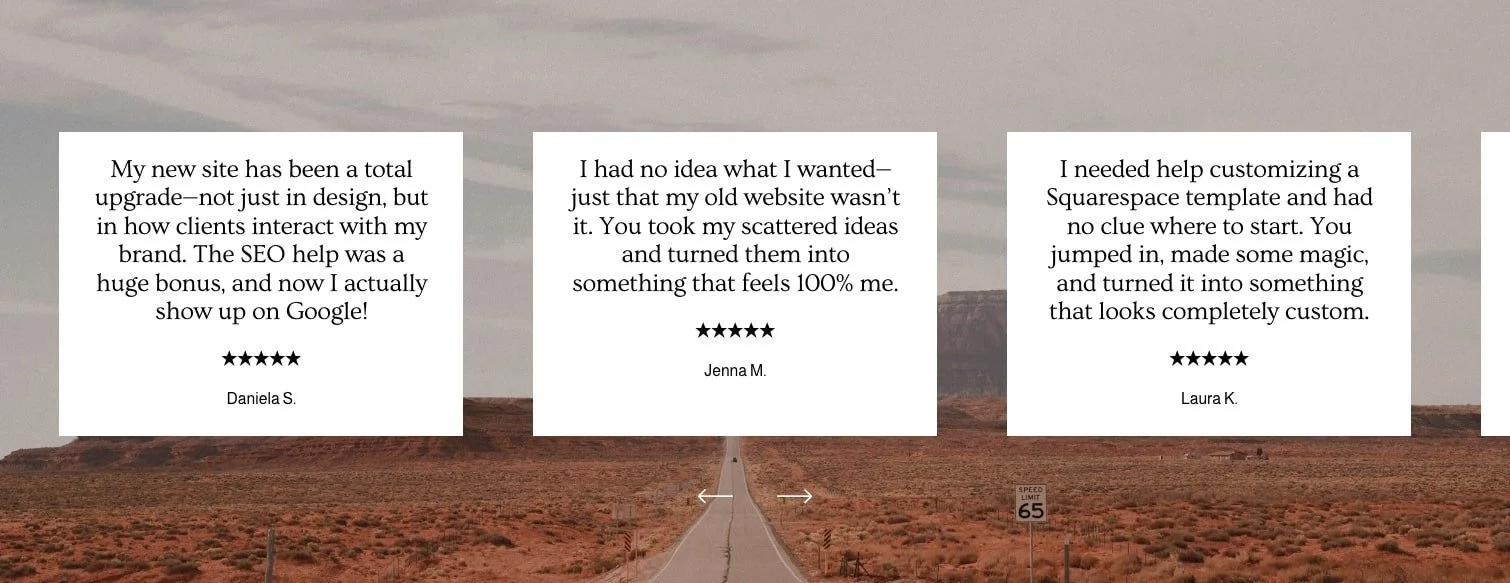
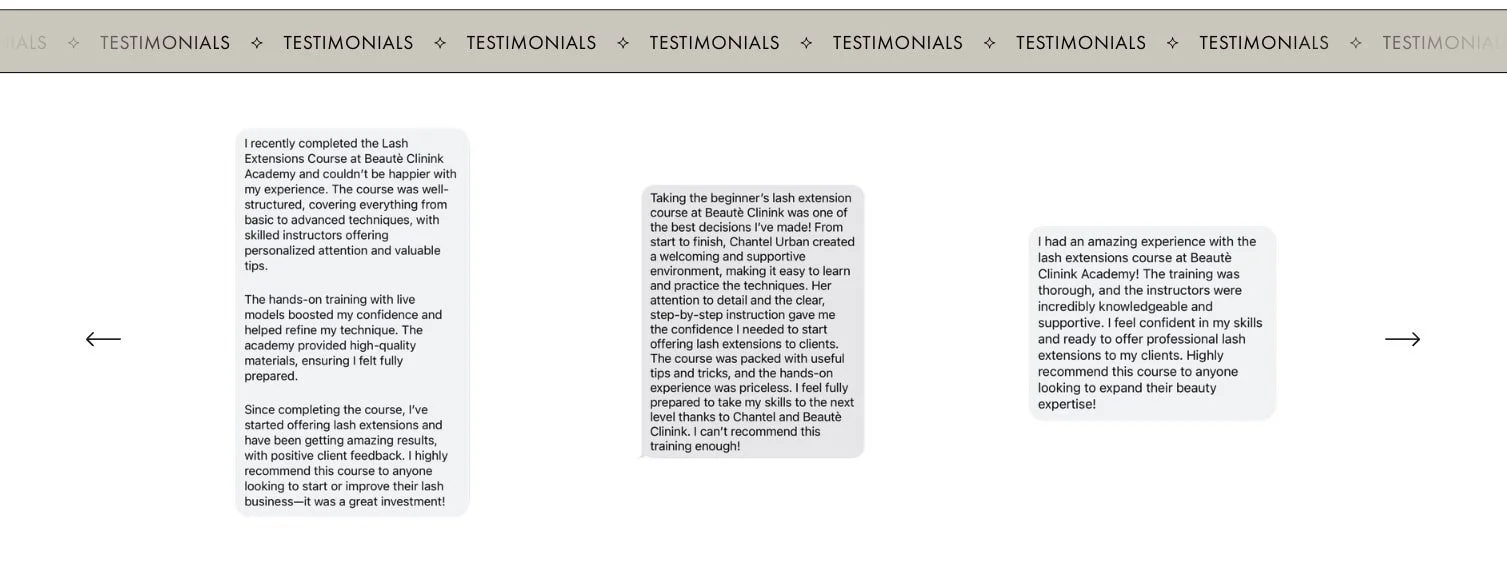
2. Review Slider
A classic and a great way to display a good number of testimonials very neatly, is the review slider.
Easily adjust to display 1, 2, or 3 reviews per slide, opt to display a thumbnail of your client or their logo, and of course showcase your beautiful review and your client's name!

How to create a review slider in Squarespace:
Click Edit in the top right corner
Hover between two sections and click the blue Add Section button
In the pop up, go to the Testimonials tab and scroll down. We generally like to start with this slider option as a base!
Once this section has been added on your page, hover over it and click Edit Content in the top right of the section.
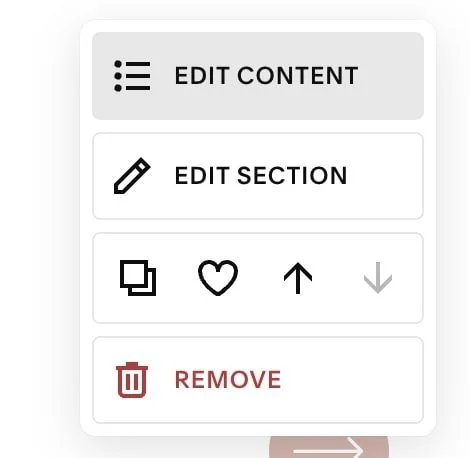
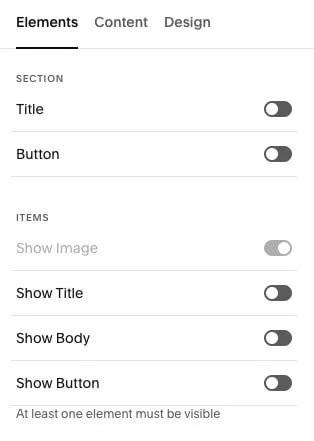
In the Elements tab, choose which elements you want to display in your review slider. We generally recommend having at least the Item Title and Body enabled, though you can also choose to show an Image if you want to add a photo of your client or their logo along with the testimonial!

Next, switch to the Content tab. This is where you will actually enter in your testimonial.
Tip! We recommend adding the Testimonial in the 'title' section and the Client's Name in the 'description' section to create that specific review look.
Tip! Copy and paste the stars to add a star rating in your review slider: ★★★★★

Click Add to add a few testimonials. Don't worry, you can add more at any time!

Next, move to the Design tab. This is where we will style the look of your review slider!
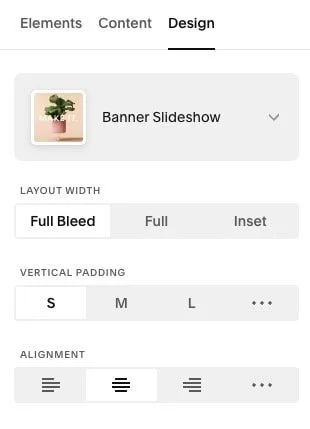
Important Settings: At the bottom of the Design panel, you will find options for Style and Size & Space
Style Settings:
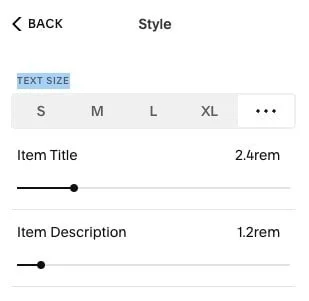
Here, you will be able to adjust the text size. Click the three dots to choose custom sizes for both the Title (aka the testimonial) and the Description (aka the client name).
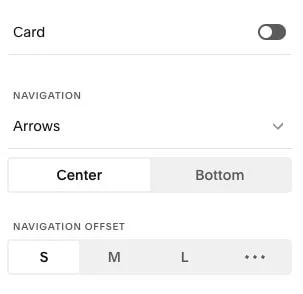
Here, you'll also be able to enable the Card setting. This adds a box around the testimonial which can be pretty handy if you would like to add a background to the section (which might make it difficult to read the review!).
Finally, you'll be able to choose how to position the Arrows to scroll through testimonials.
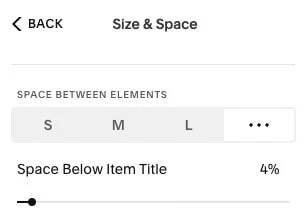
Style & Space Settings: This is where you can adjust the spacing of just about any element in your review slider, from the top & bottom padding, to the space between the title and description, width, and more.
The best option here is to go through each setting and play around with what it does! Remember to click the three dots to get more customization options.
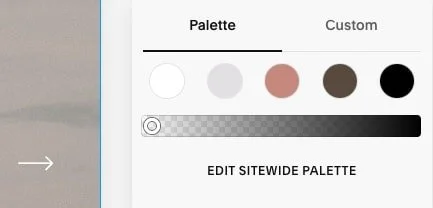
Tip! You can change the Text, Arrow, and Card Background colors, by going to Site Styles (paintbrush icon in the top right corner) > Colors > Click on the color tab in the top right of the section > then click on the section to bring up the color settings for that particular area of your site.
Find the List Section: Banner Slideshow color settings and customize as you please!
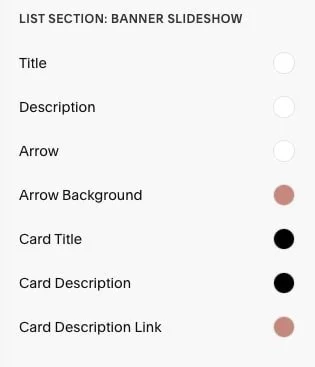
Tip! If you want to remove the Arrow Background to only display the arrow, set the background color to transparent
How to add a background to your review slider:
Exit out of the Site Styles, hover over the section and click Edit Section in the top right corner
Head to the Background tab and add an Image, Video, or Art
Add a fun Image Effect and play with the Opacity if you want to!

How to show multiple reviews on one slide:
Hover over the section and click on Edit Content then go to the Design tab
Change the layout from Banner Slideshow to Carousel
Tip! You may need to go back to the Elements tab to toggle on/off which elements show
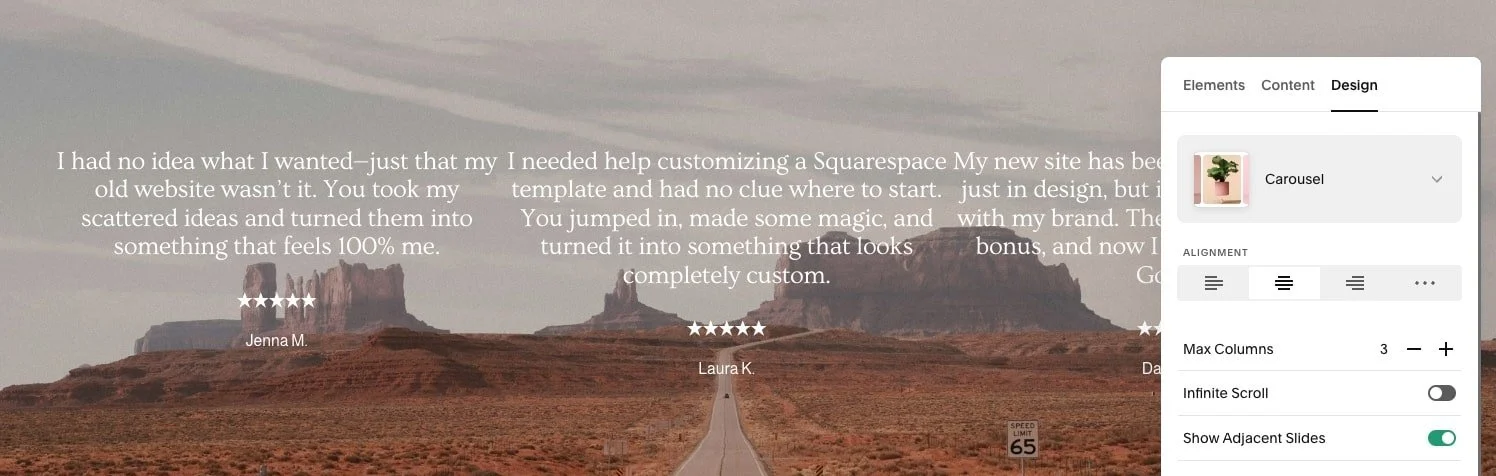
Adjust the settings as you please!
Select how many reviews you want to show per slide by adjusting the Max Columns number
Adjust the text size or add a card background in the Style settings
Adjust the spacing and padding in the Size & Space settings
3. Reviews Dropdown
A more unusual way of showcasing your testimonials is using a dropdown (aka an Accordion block), creating a neat way to showcase longer testimonials without overwhelming site visitors with walls of text at first glance.

How to add a review dropdown to your Squarespace site:
In Edit mode, hover over the section where you would like to add your reviews and click on the +Add Block button in the top right corner
Select Accordion in the pop up menu
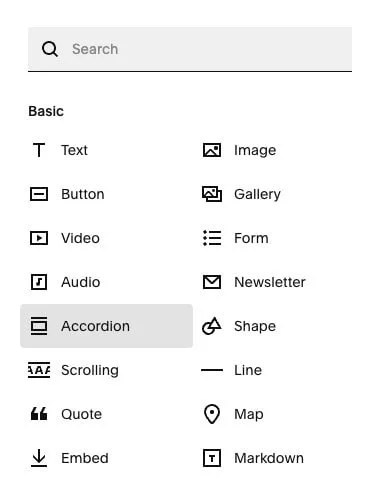
Position your newly added Accordion block roughly where you want it, then double click on it to access its settings
Content tab: This is where you will add your testimonial content. You have a few options here:
Add the client/business name as the Title and the review as the Description

Add a snippet of the testimonial as the Title to intrigue the reader, and the rest of the testimonial in the Description.

Or truly, anything you'd like!!
Next, style your accordion block by going to the Design tab

Here, you'll be able to set the title and description text style and size, adjust whether you want to display dividers, what kind of icon you want to display, and of course the padding between each testimonial and whether you want to add a background. You can get really creative!
4. Review Screenshots & Comments
Testimonials don't always come in as neat Google or Facebook reviews these days. Your clients might chat with you directly giving you all kinds of great praise, often quite raw words which can make an even deeper impression with your next potential clients.
You might want to save these kind words as screenshots which you can then display on your site in a few different ways:
Option 1: Image Scatter
Add a new section on your site, add a background, add multiple image blocks which you can scatter around the section and fill with fun testimonial comment screenshots:

Option 2: Review Slider with Images Only
Another option is to create a neat slider featuring all of your reviews like the below:

To do this, click on Add Section, go to the Testimonials tab in the pop up and select this section to start with:
Hover over the newly added section and click on Edit Content in the top right of the section.
In the Elements tab, select which elements you want to show in the section. We recommend only keeping Show Image on for a neat look.
In the Content tab, upload your screenshots of reviews.
Then in the Design tab, adjust the settings, spacing, and padding! (Refer to our reviews option #2 for more info)
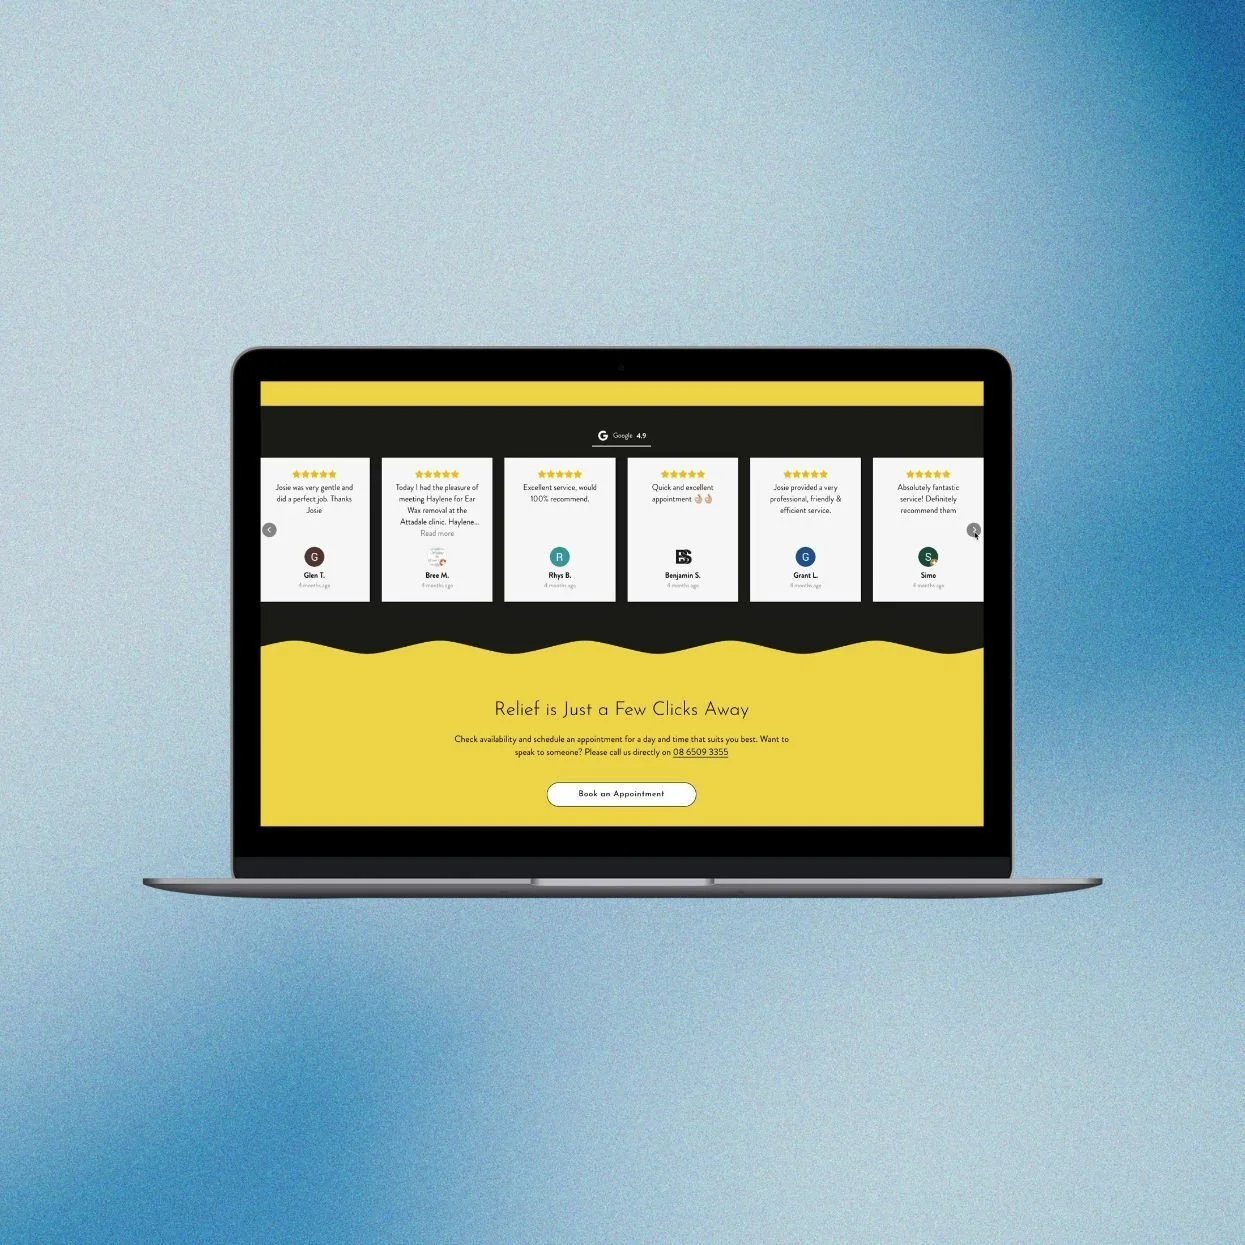
5. Elfsight Reviews Plugin*
If you want to automatically bring in your reviews from Google,Facebook or Airbnb as they come, one amazing little plugin to help you do just that is Elfsight's All-in-One Reviews Plugin.
Here’s how to set up the Elfsight Review Plugin on your Squarespace site in just a few steps:
Head to this page
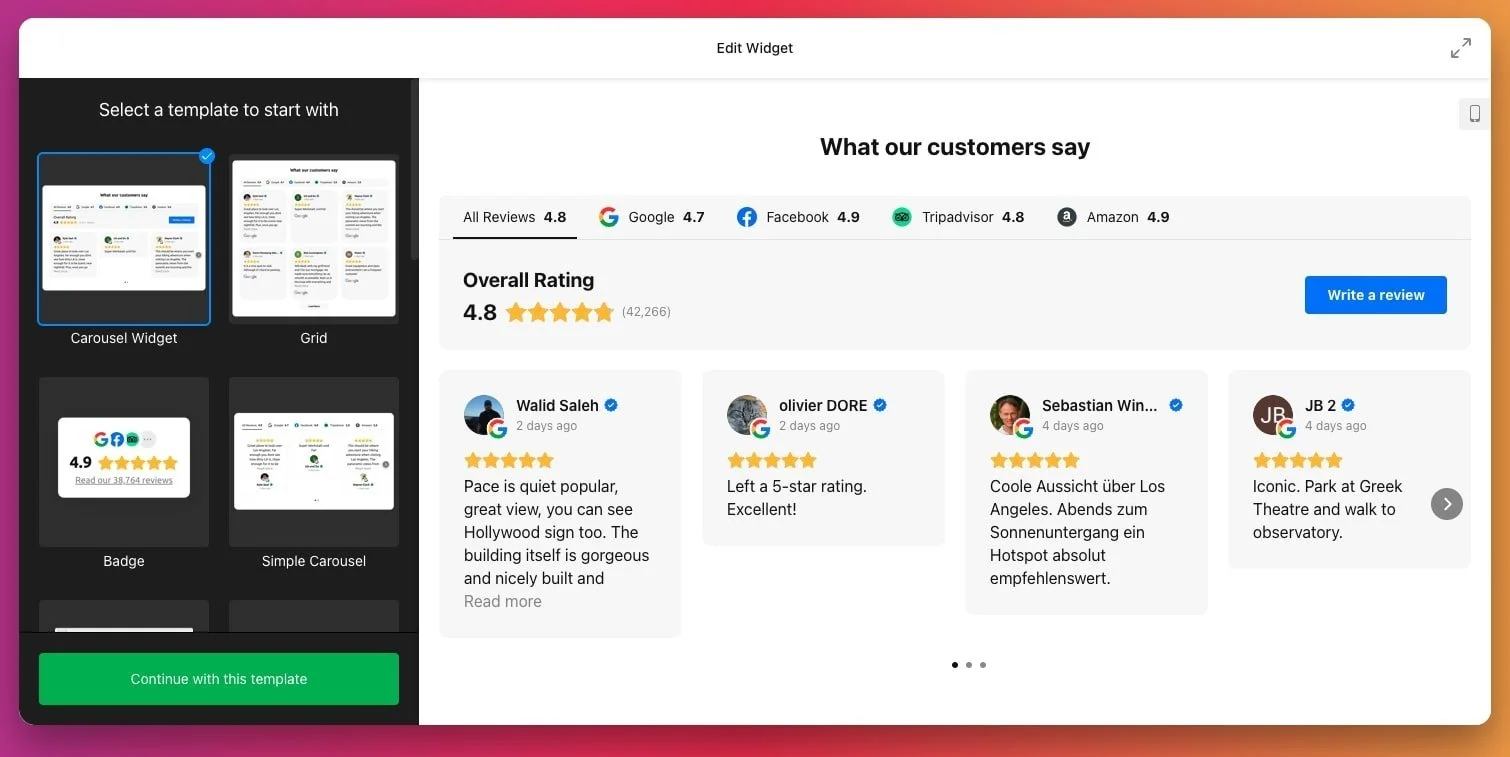
Scroll down to the widget preview
Use the left hand side menu to choose a layout. Choose from carousel, grid, or badge, there's tons of options!
Click the green button 'Continue with this template'
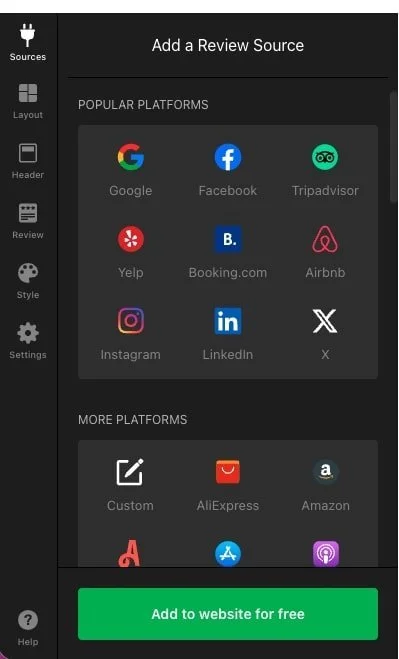
Choose which platforms you want to bring in reviews from and add your account link
Once you connect an account, you'll be able to filter by number of stars and how many reviews you want to show.
Explore the rest of the settings in the left hand sidebar to customize your widget's header, review look, color scheme, and fonts.
Once you're happy with the look, click the green 'Publish' button in the top right corner
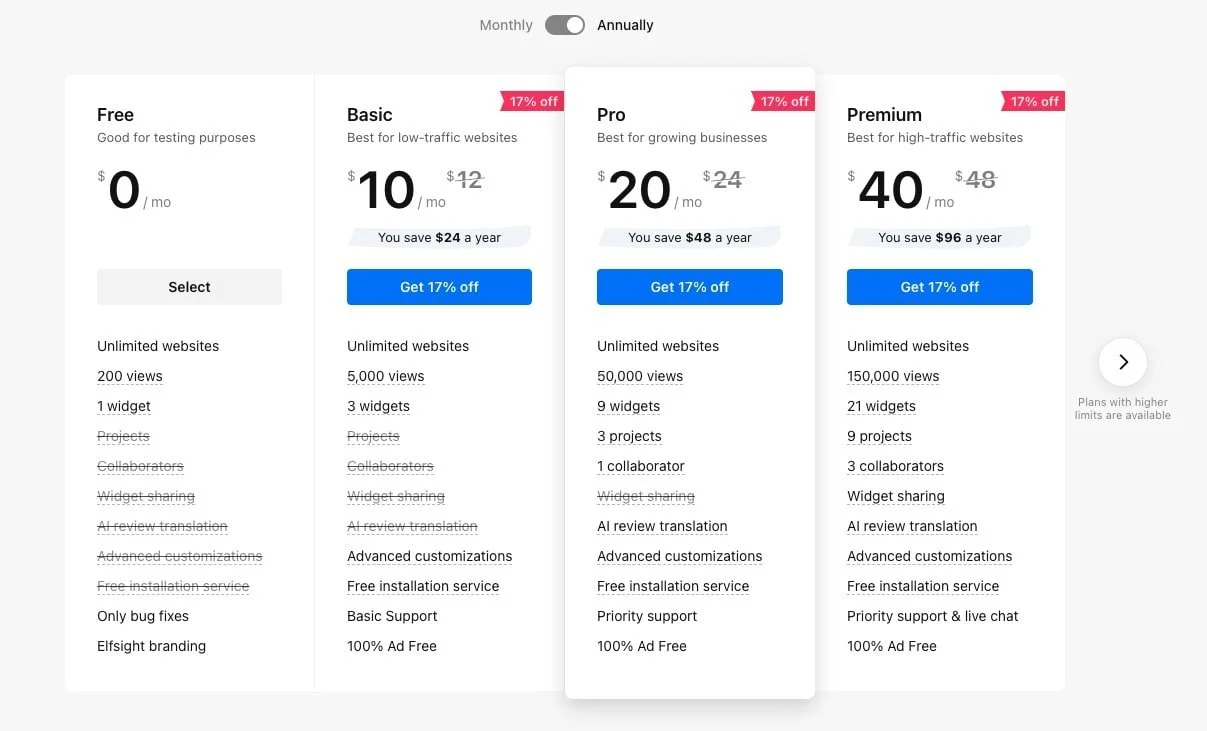
Select the Elfsight plan that you want to start with (you can use the plugin for free for up to 200 views!)
In the Embed Code panel, click the green 'Copy Code' button.
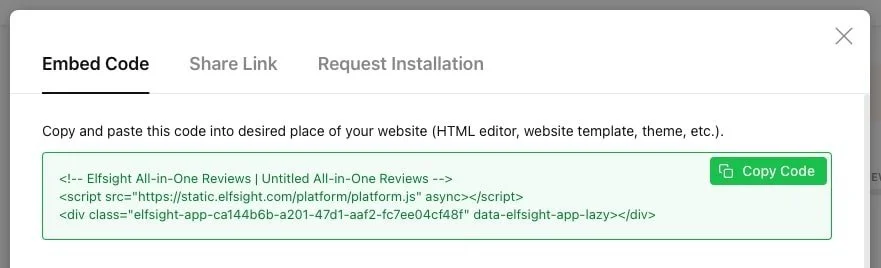
Back in your Squarespace site, head to the page that you want to add the reviews to, click “Edit”, then click the + icon to add a new block.
Choose a Code block in the pop up.
Double click on the block to access its settings and paste the Elfsight embed code into the box.
Click Apply, then Save the page.
🎉 That’s it! Your beautiful reviews will now appear live on your Squarespace site.
Need help setting up the plugin or showcasing your reviews? Book in for an Hour of Power and we'll take care of everything for you ✨
Read more 👇